Download atbridge.ai
Two pieces: the Thunderbird add-on and the atbridge.ai core (a small command-line tool). Install both, connect them, done — on macOS, Linux, or Windows.
Before you start
- Install Thunderbird on your computer. Get Thunderbird
- Add at least one email account in Thunderbird — you'll need it to finish atbridge setup.
Download atbridge.ai add-on for Thunderbird
The add-on is a .xpi for Thunderbird.
atbridge runs on a desktop — macOS, Windows or Linux.
It can't be installed on a phone or tablet (iOS/Android). Open the download page on your computer to install atbridge.
Download anyway✓ Download started — follow the install guide below ↓
⏳ The add-on goes live at launch. Everything else on this page works now — come back for this file, or ask us for early access.
Install atbridge.ai add-on in Thunderbird
In Thunderbird, install the file you just downloaded — the steps below show exactly where to click.
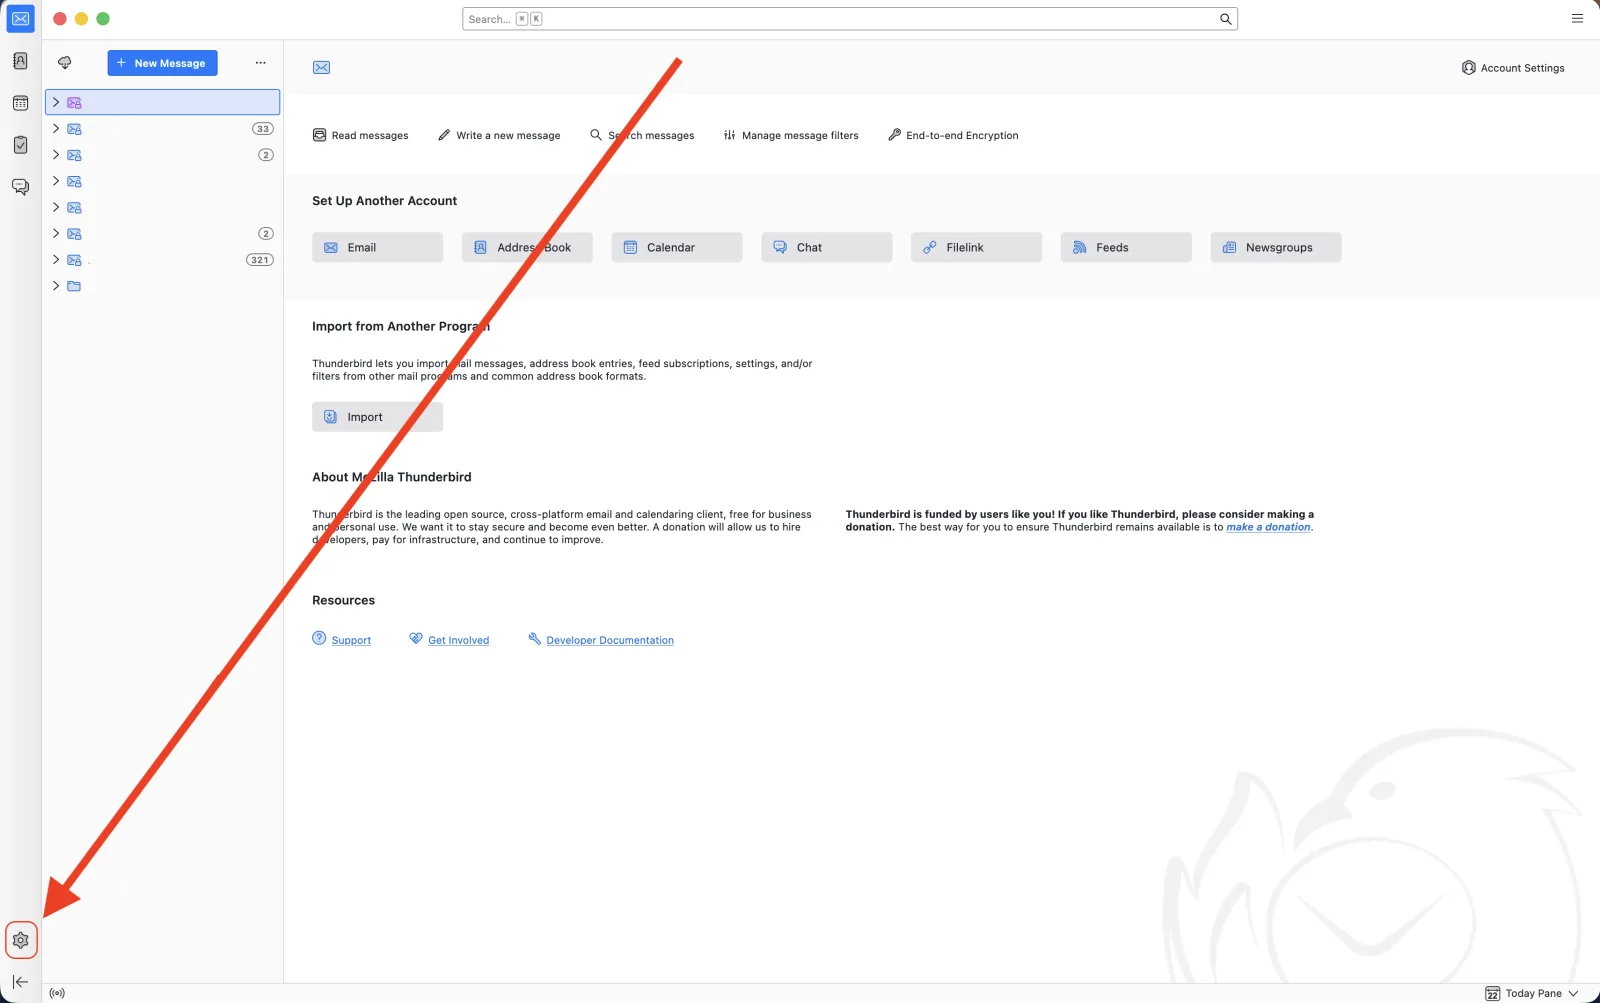
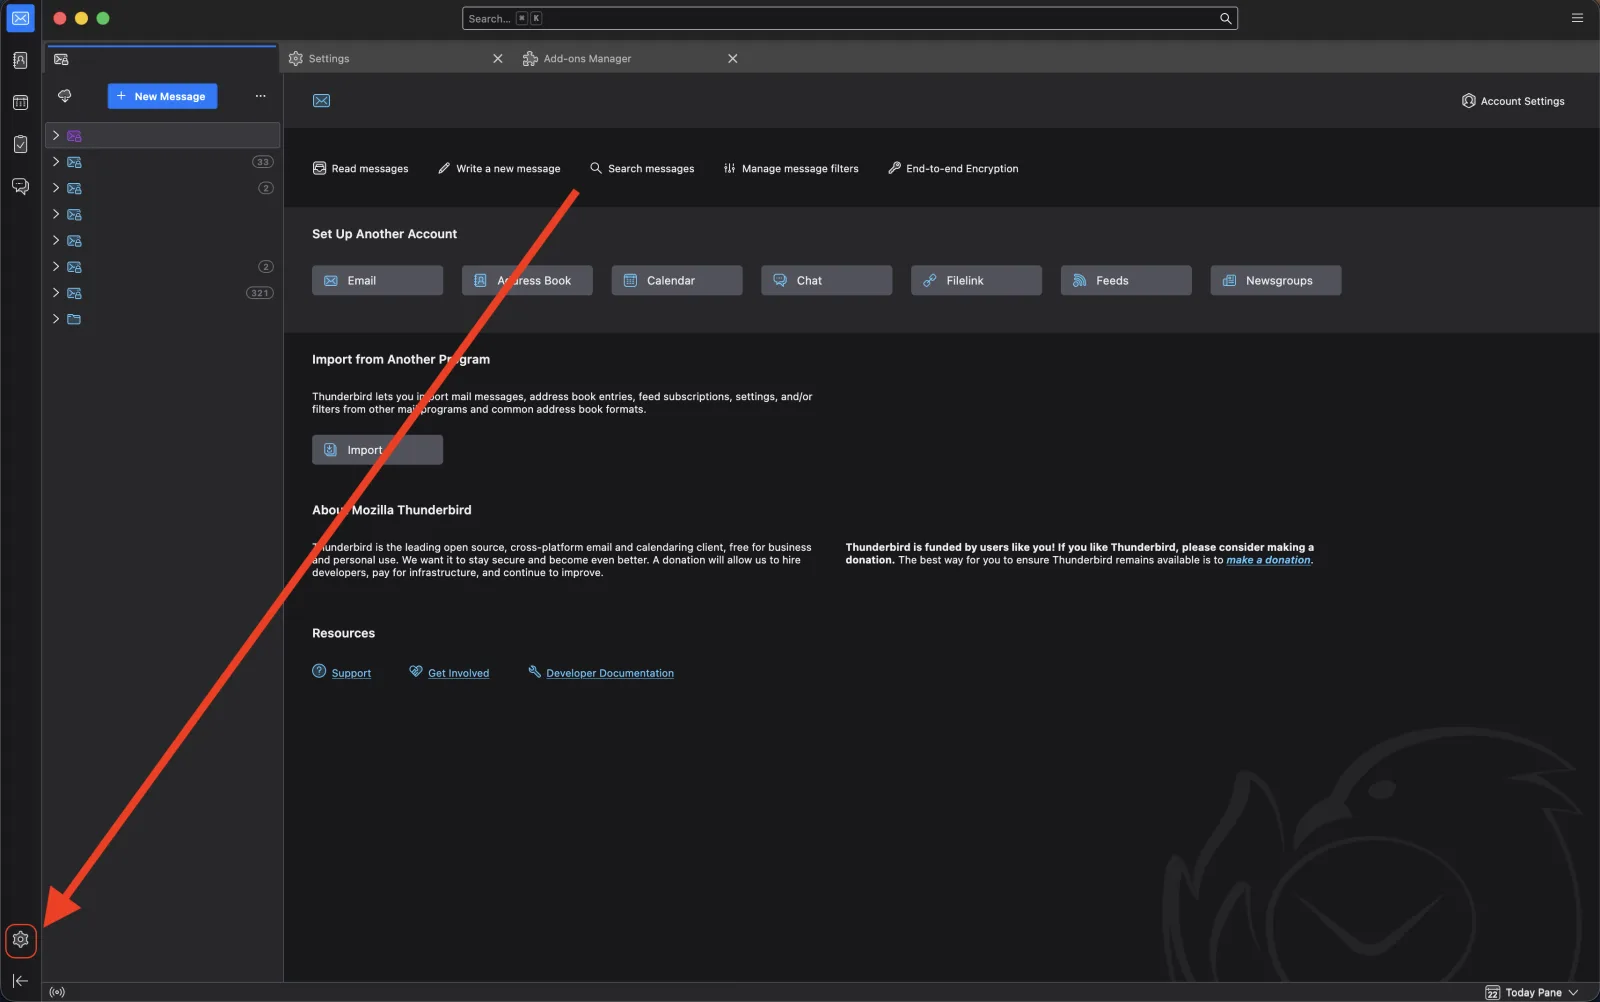
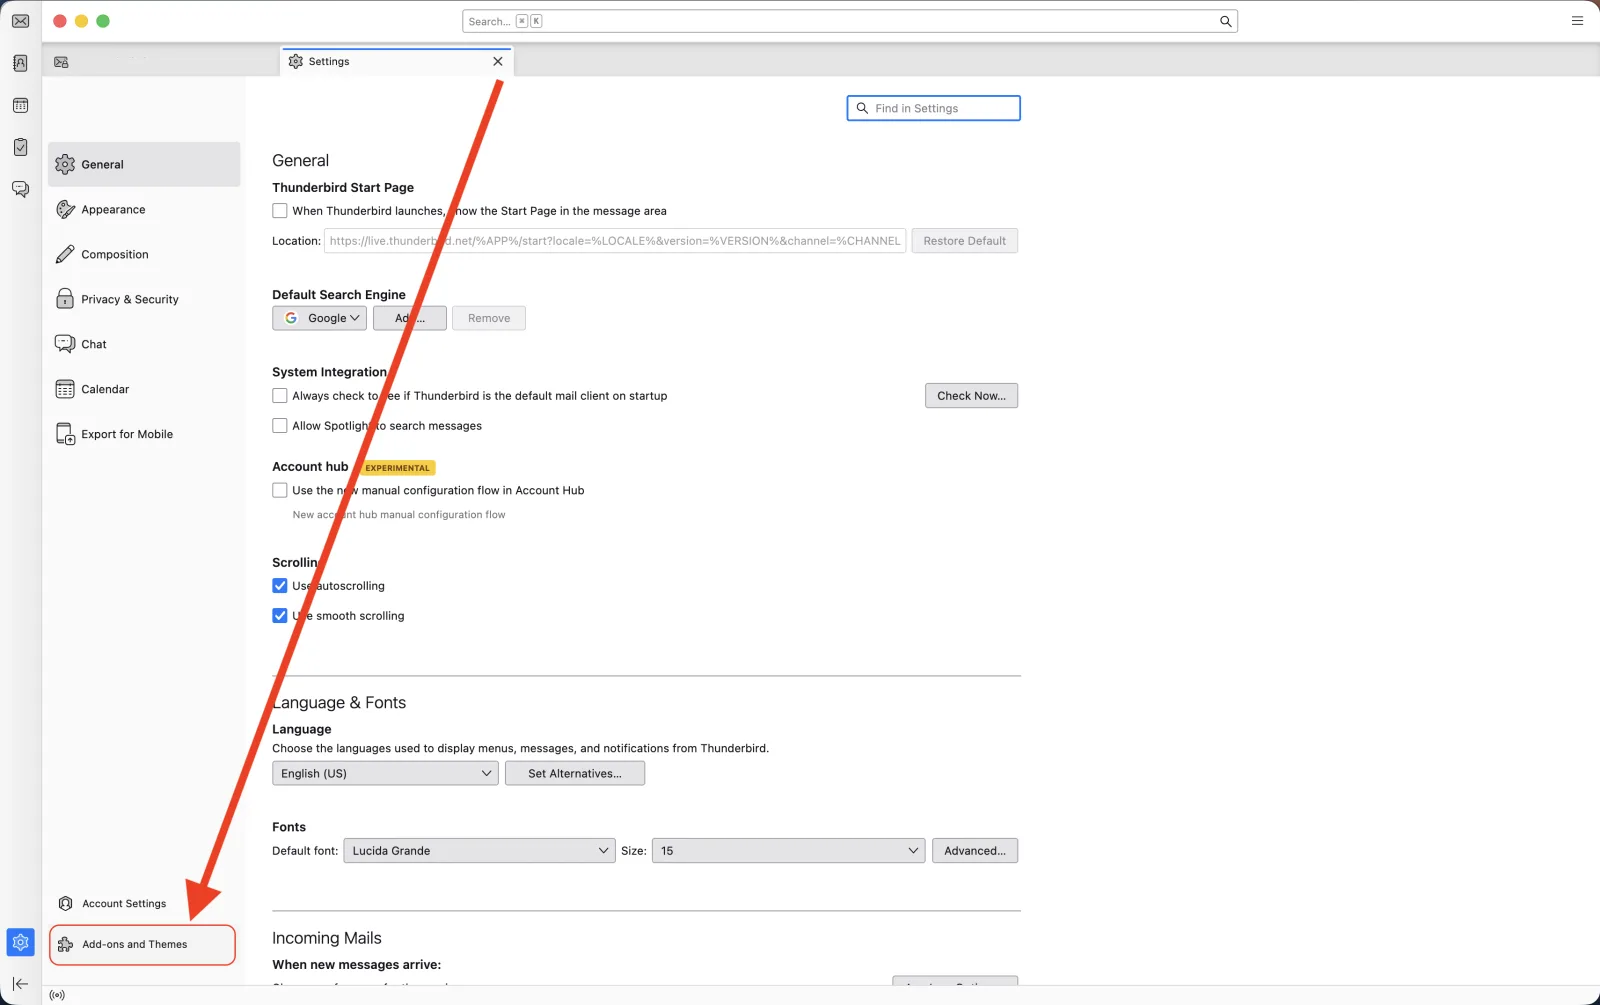
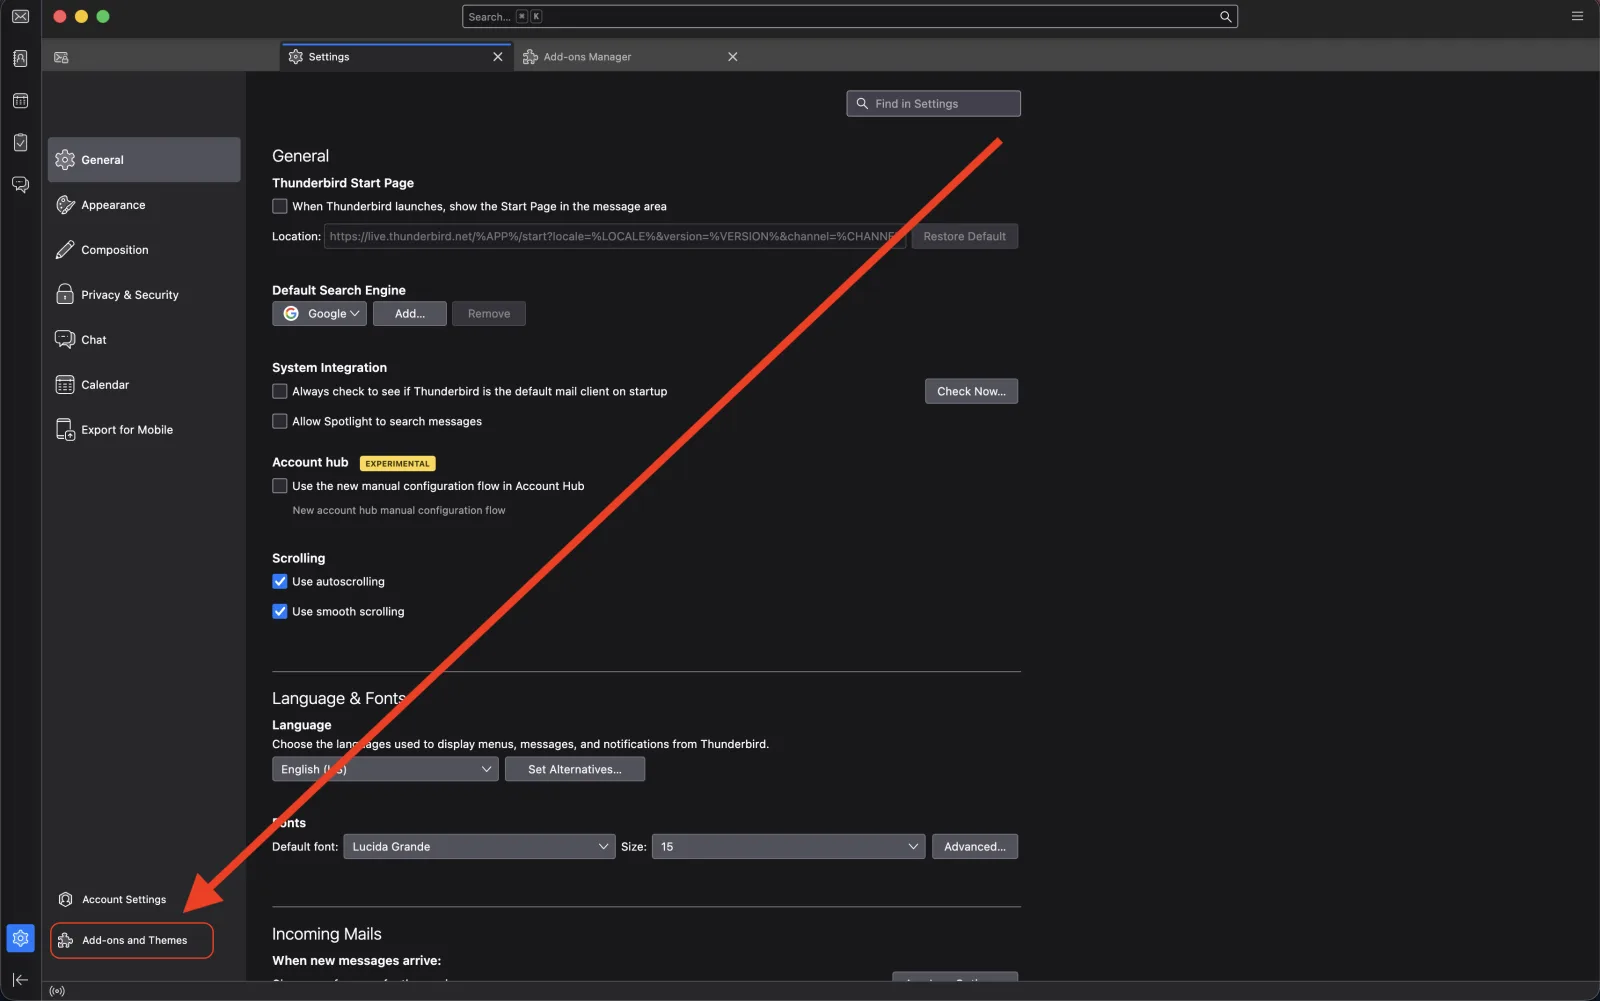
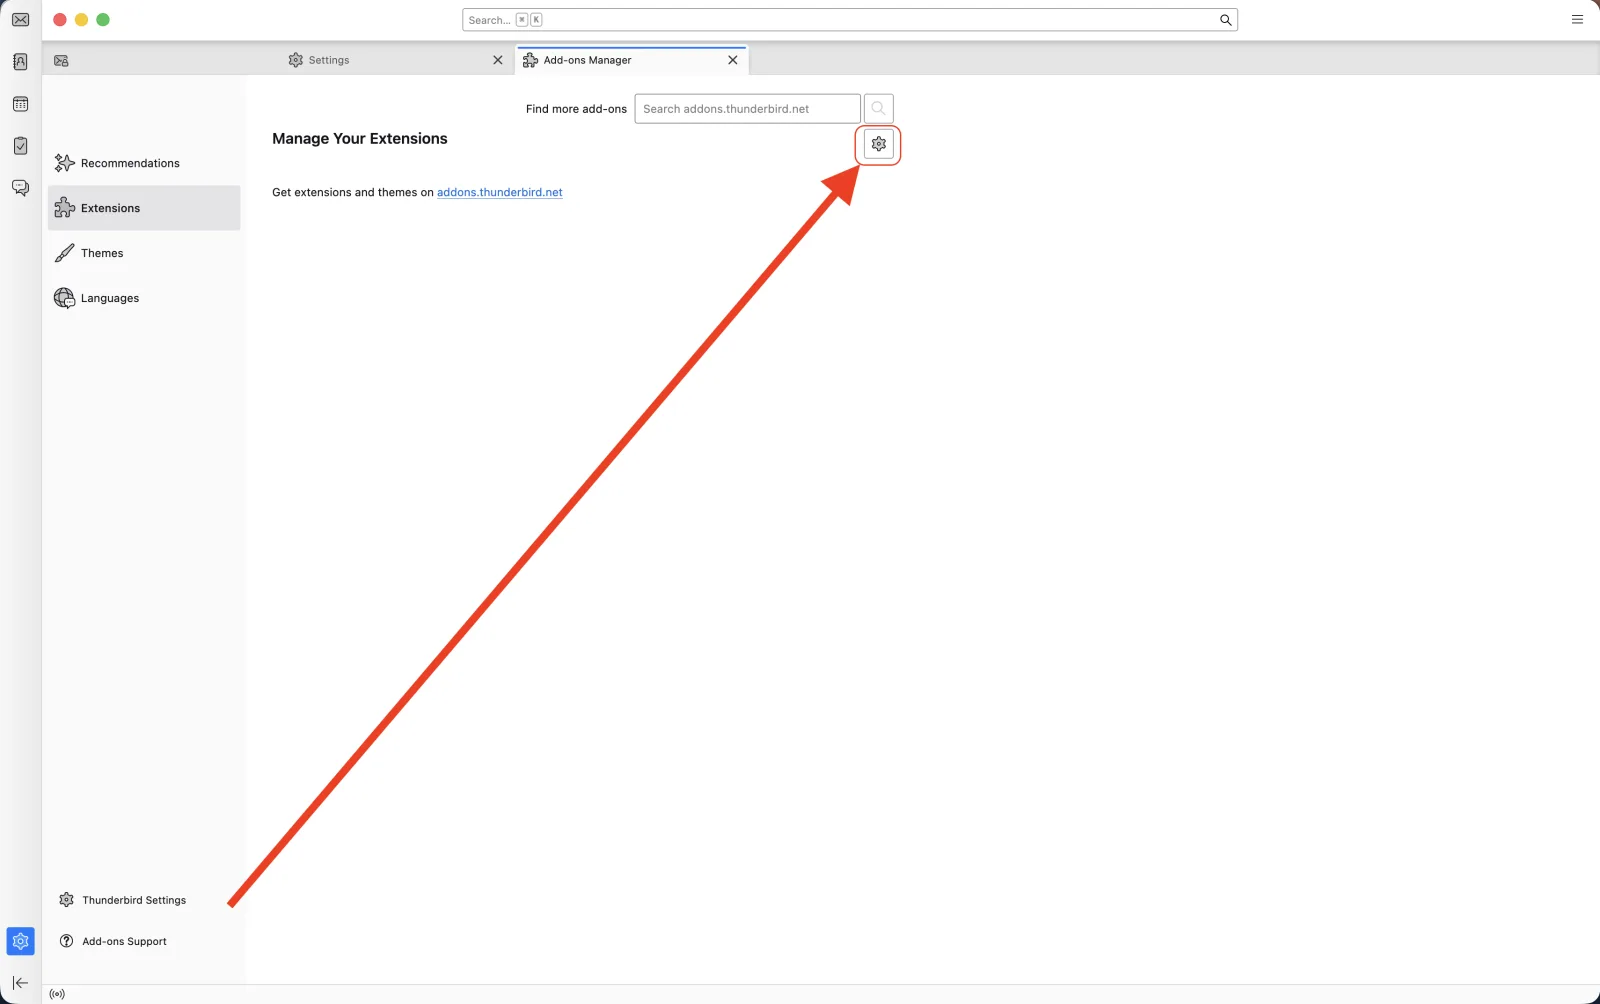
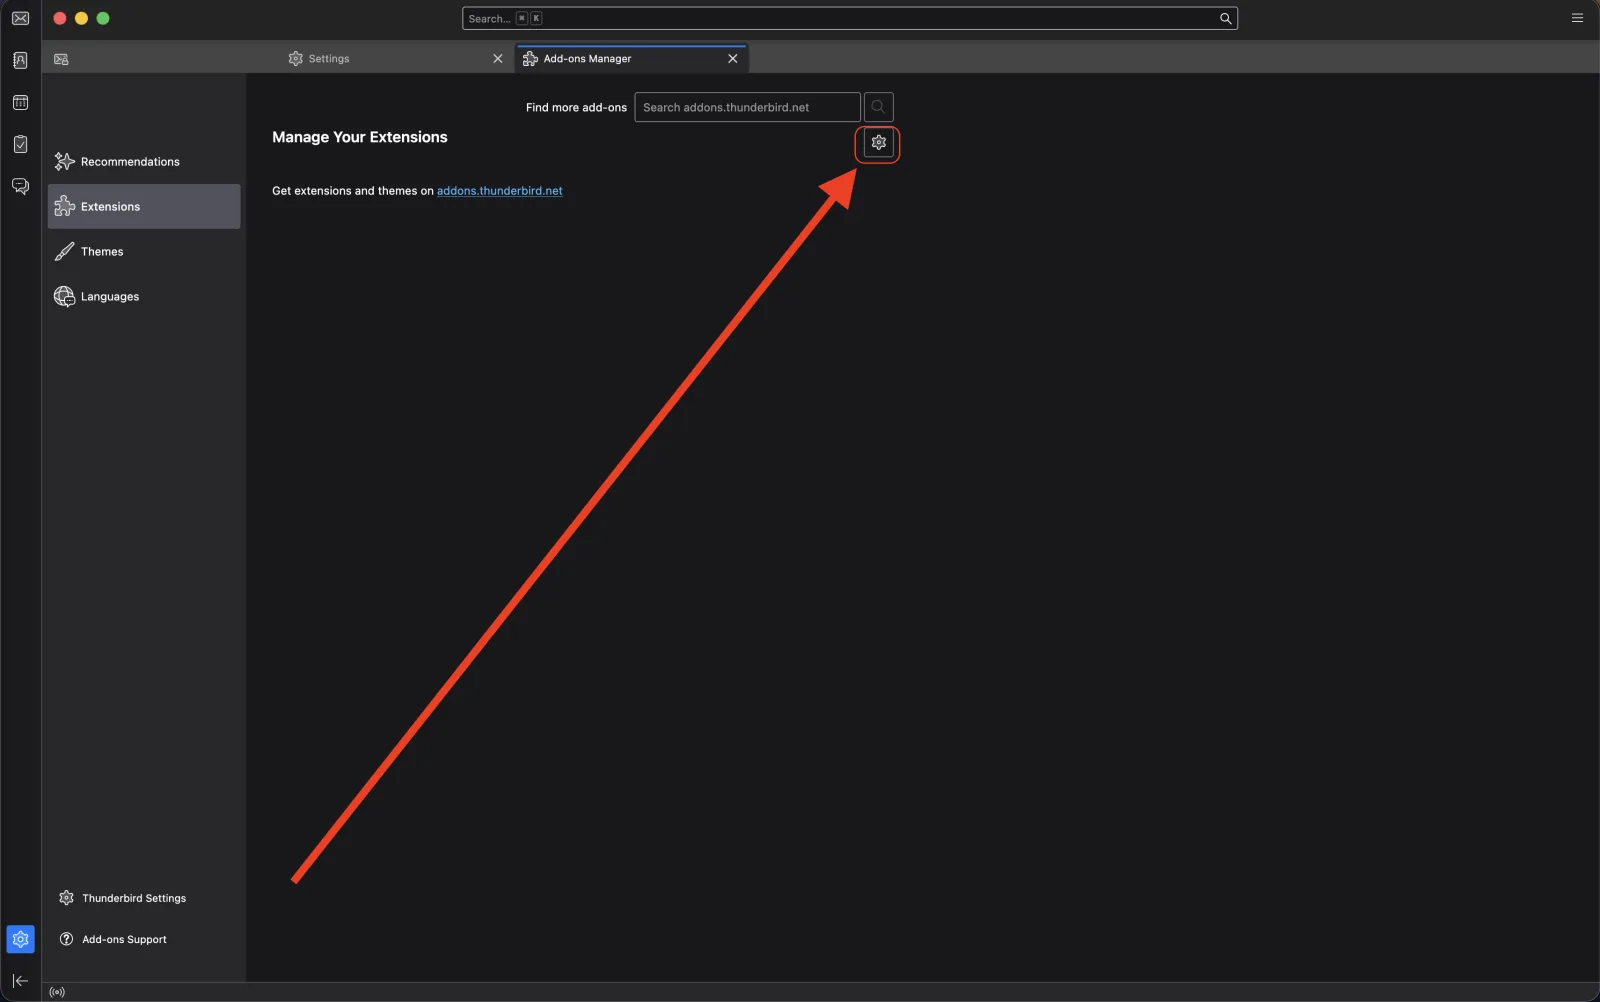
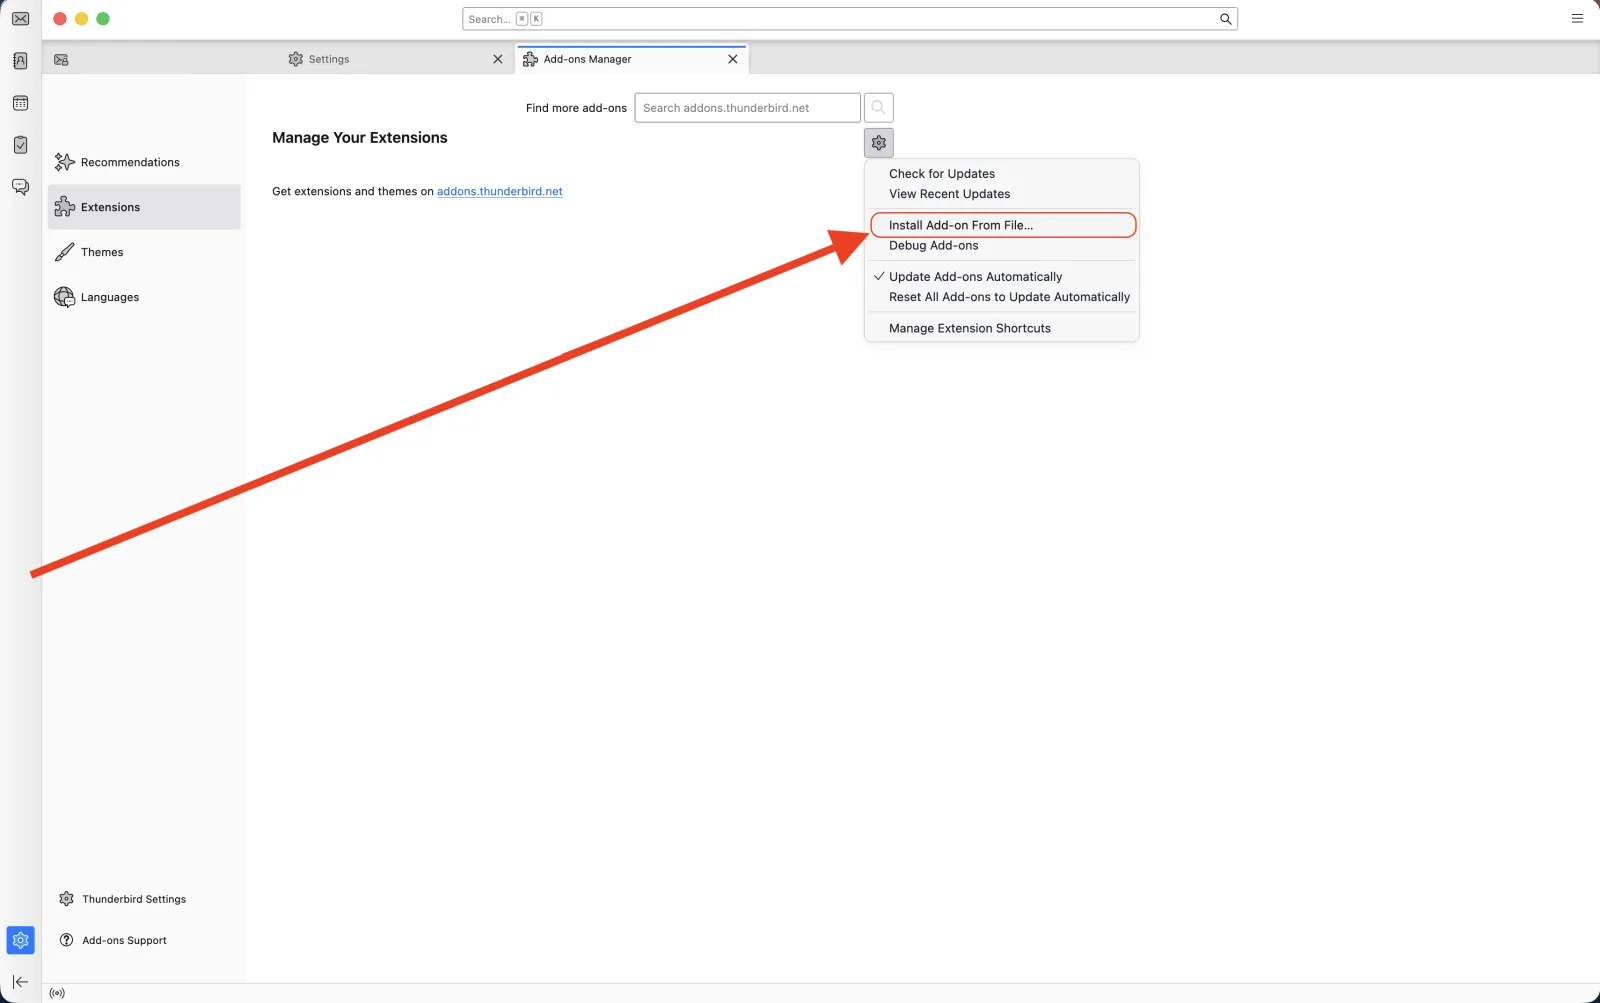
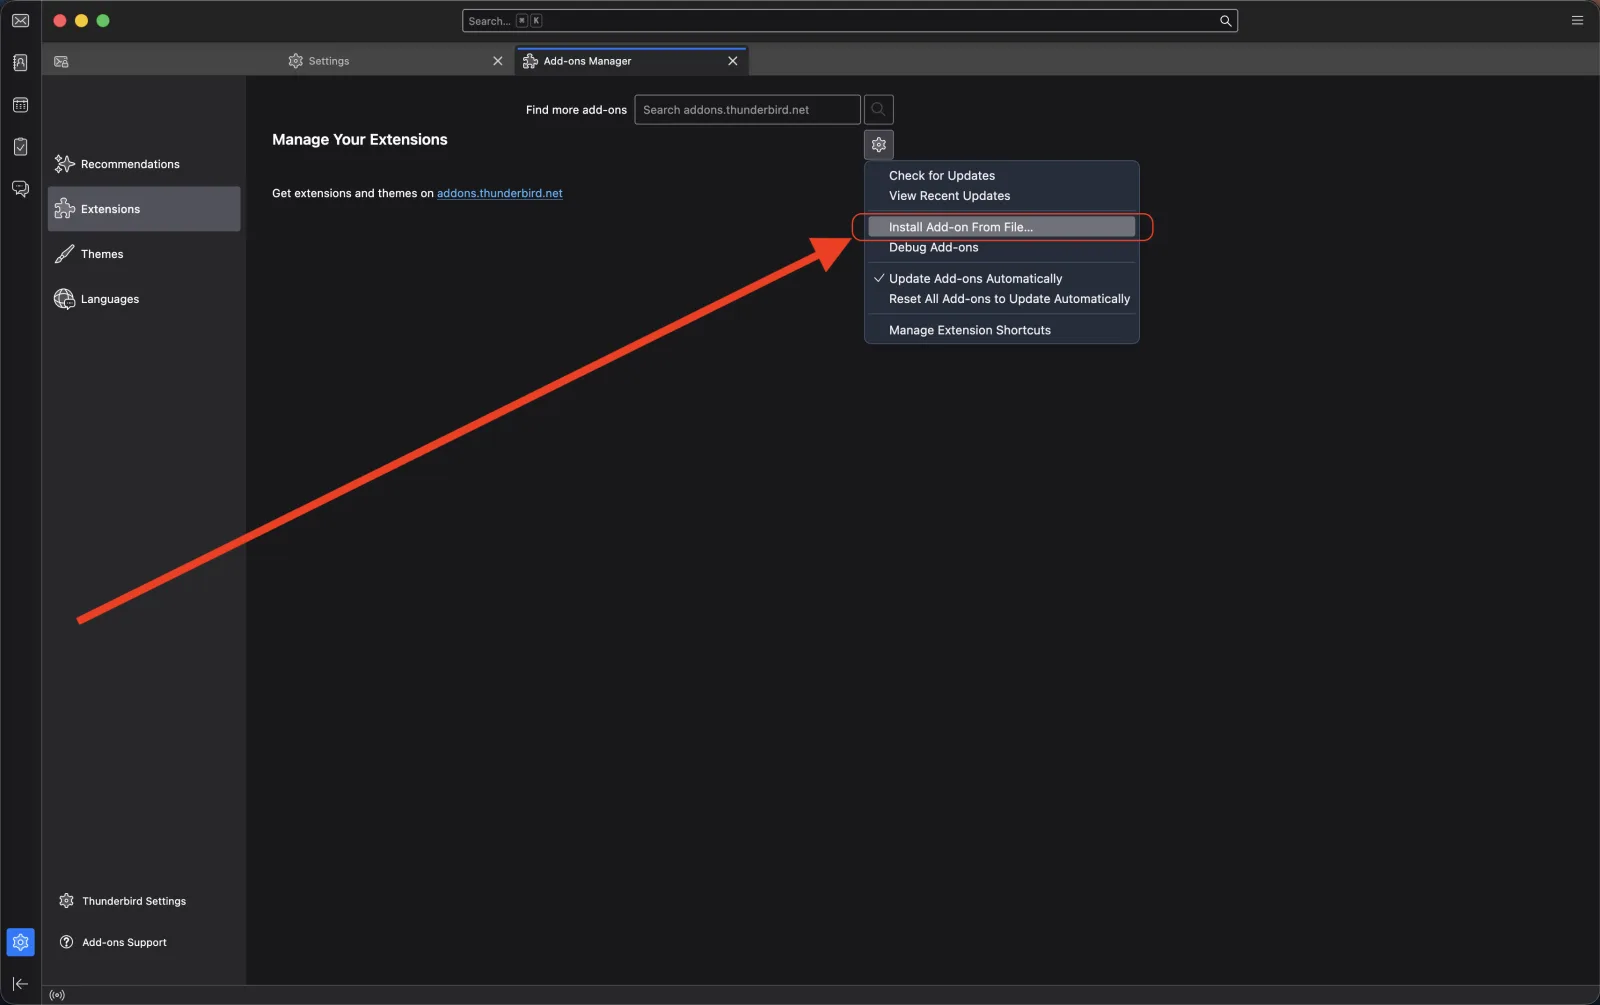
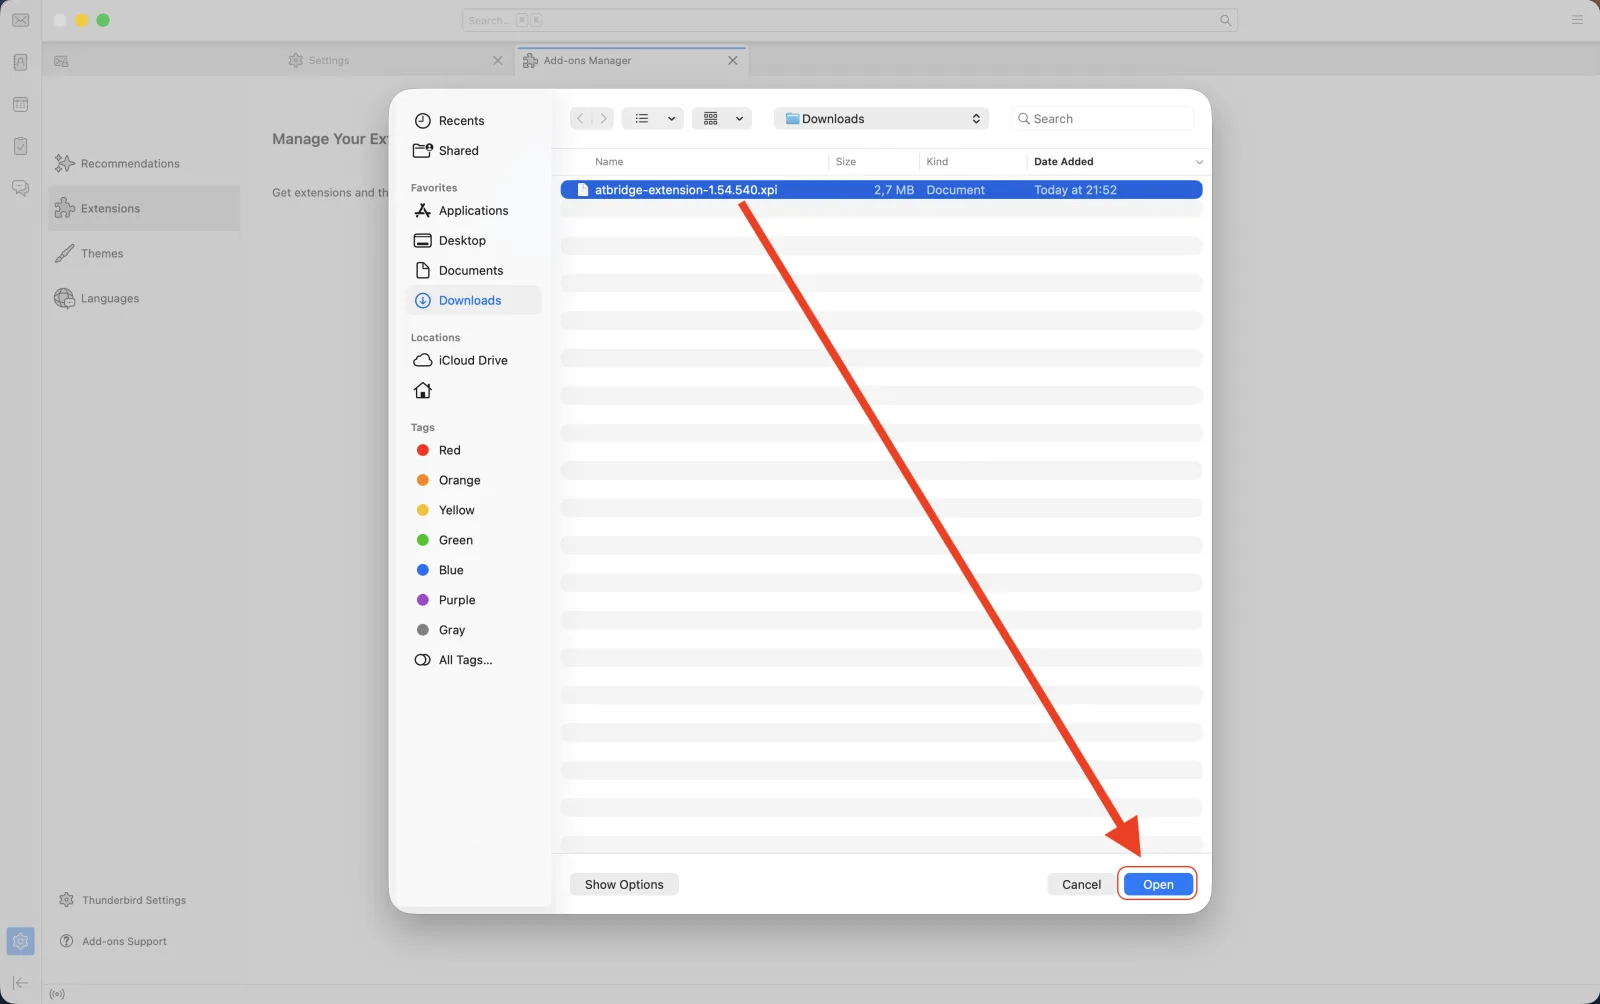
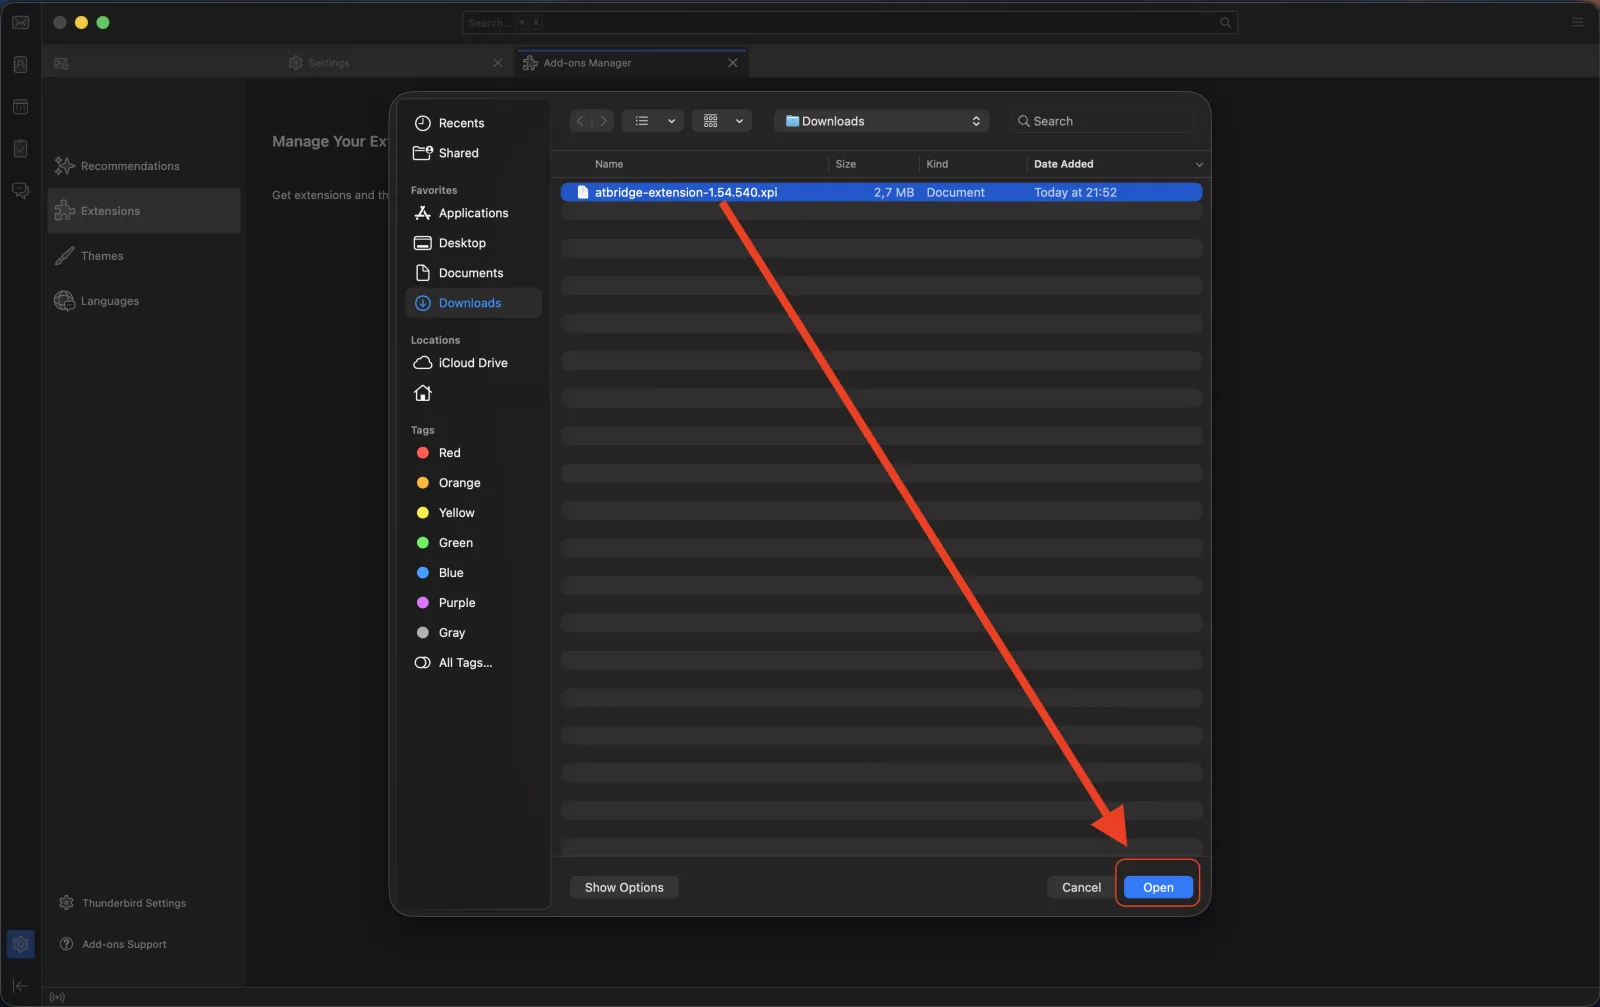
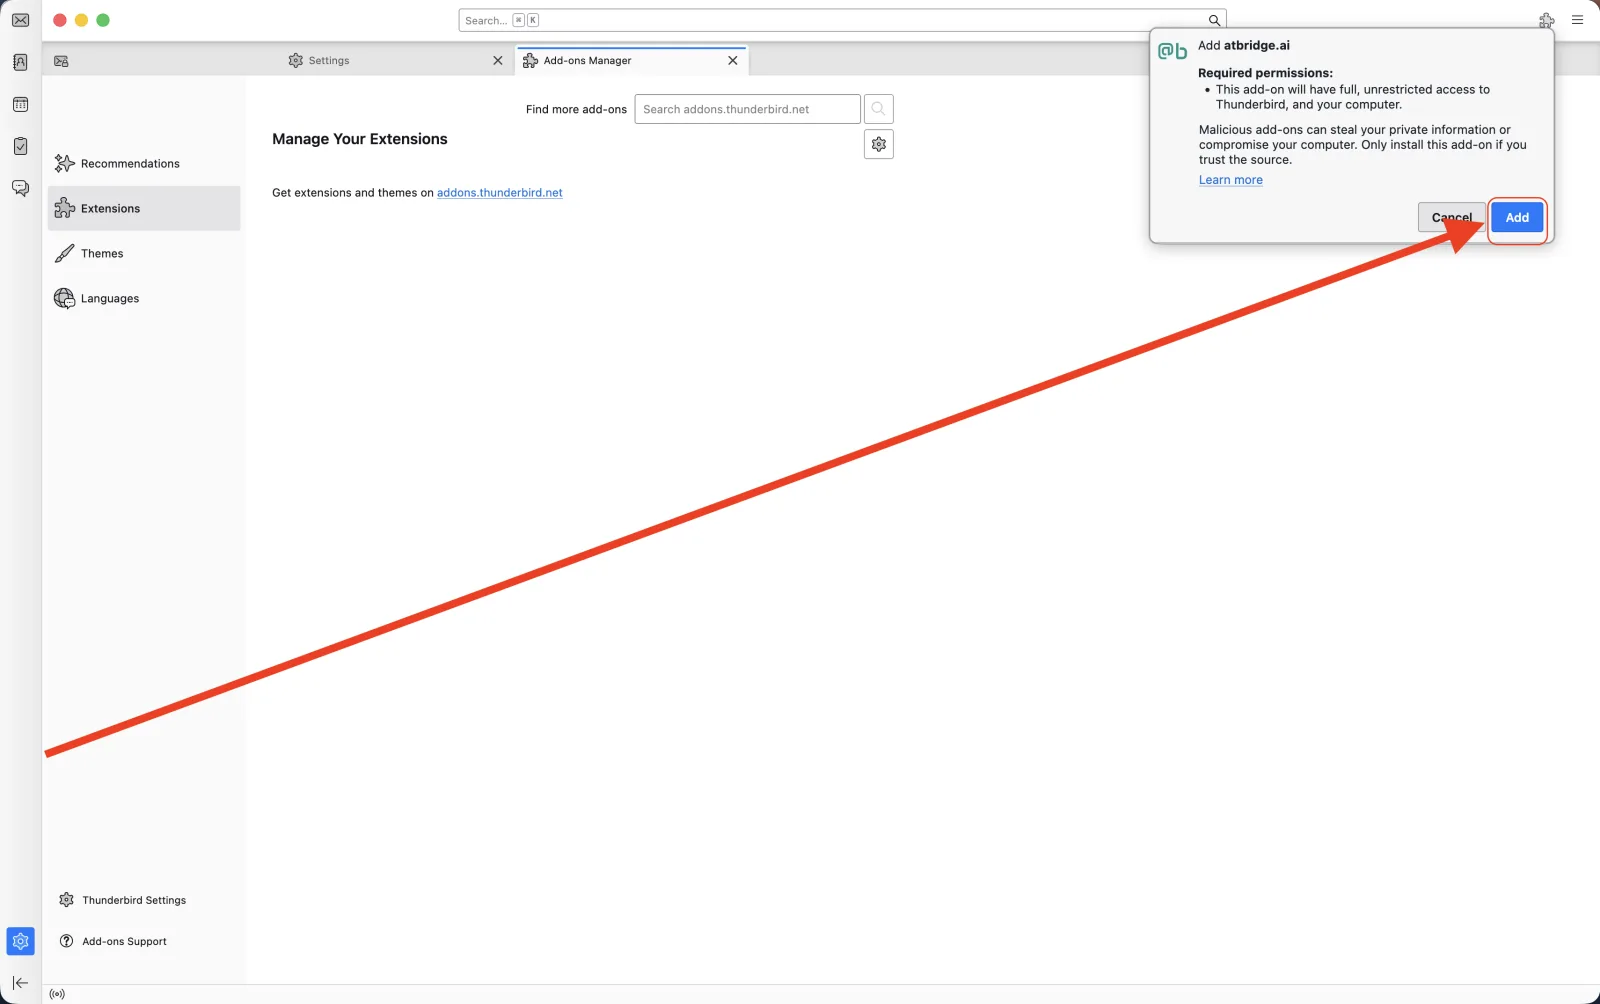
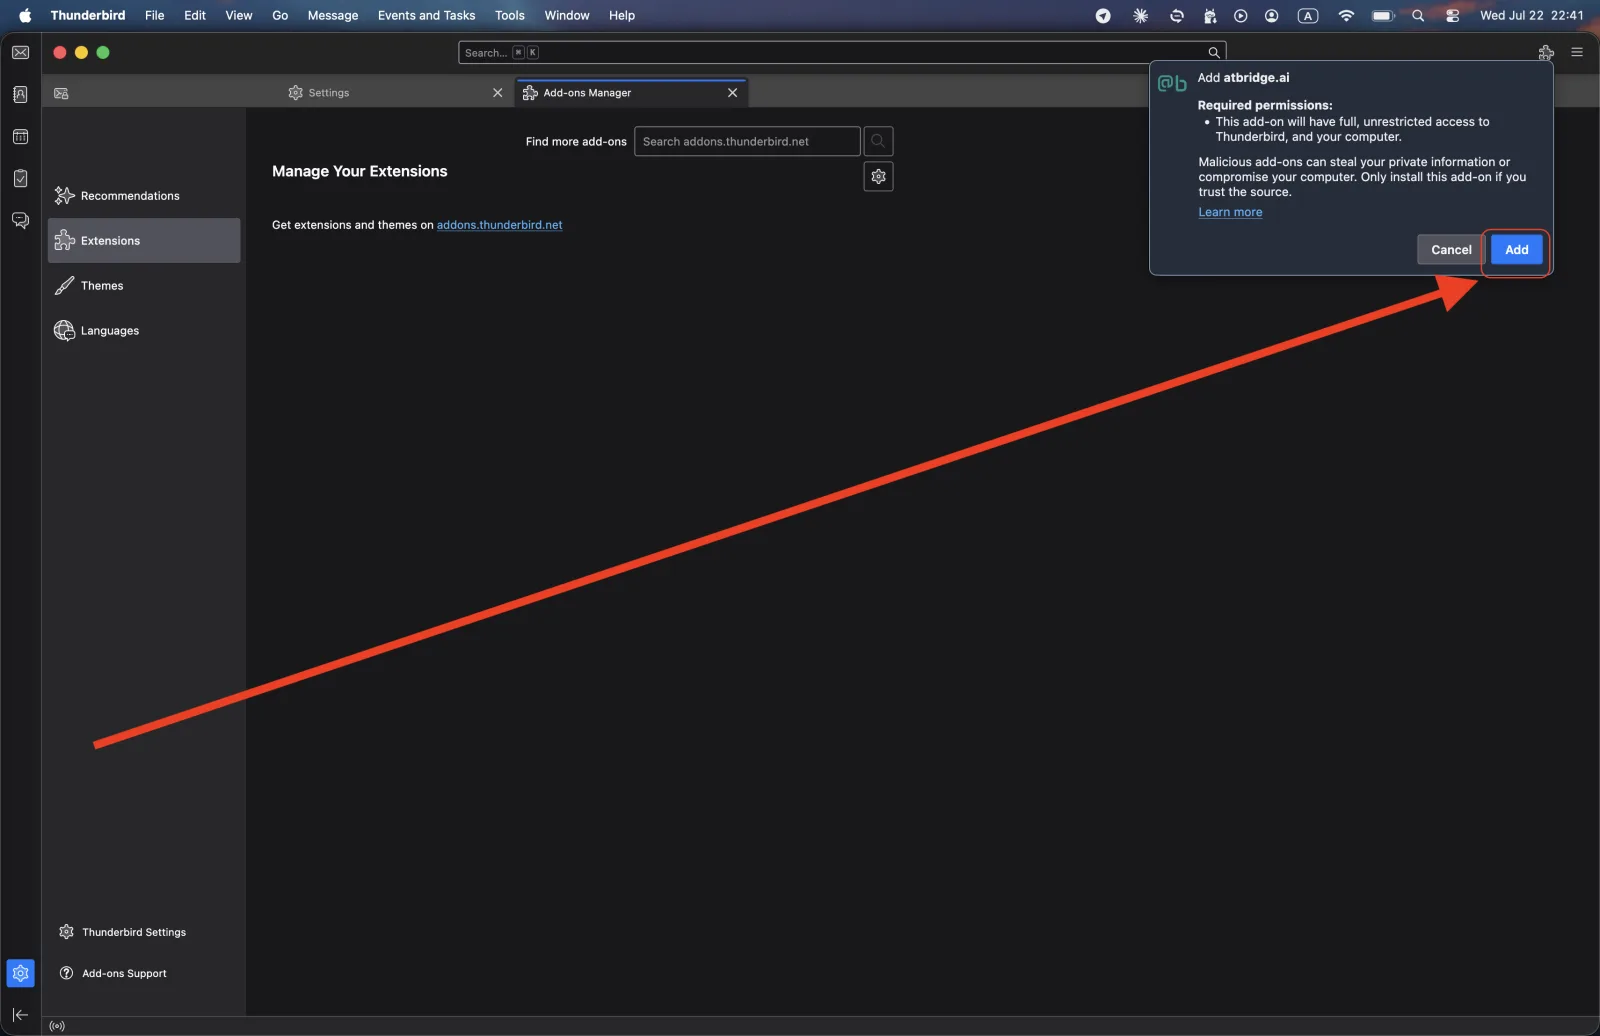
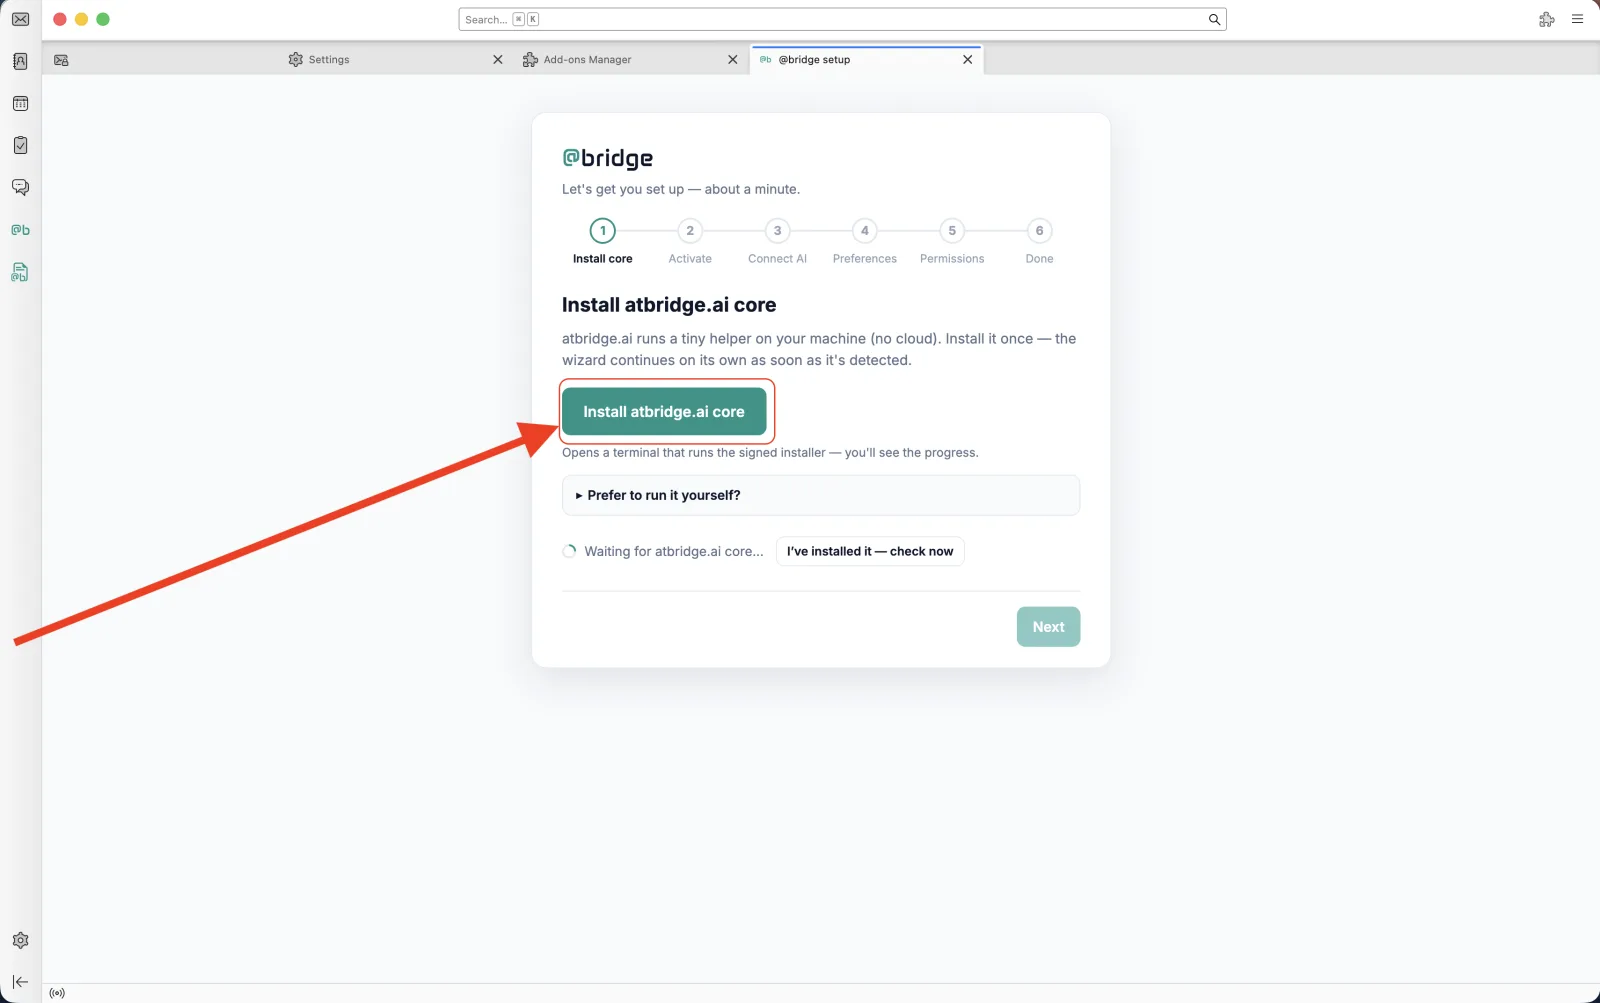
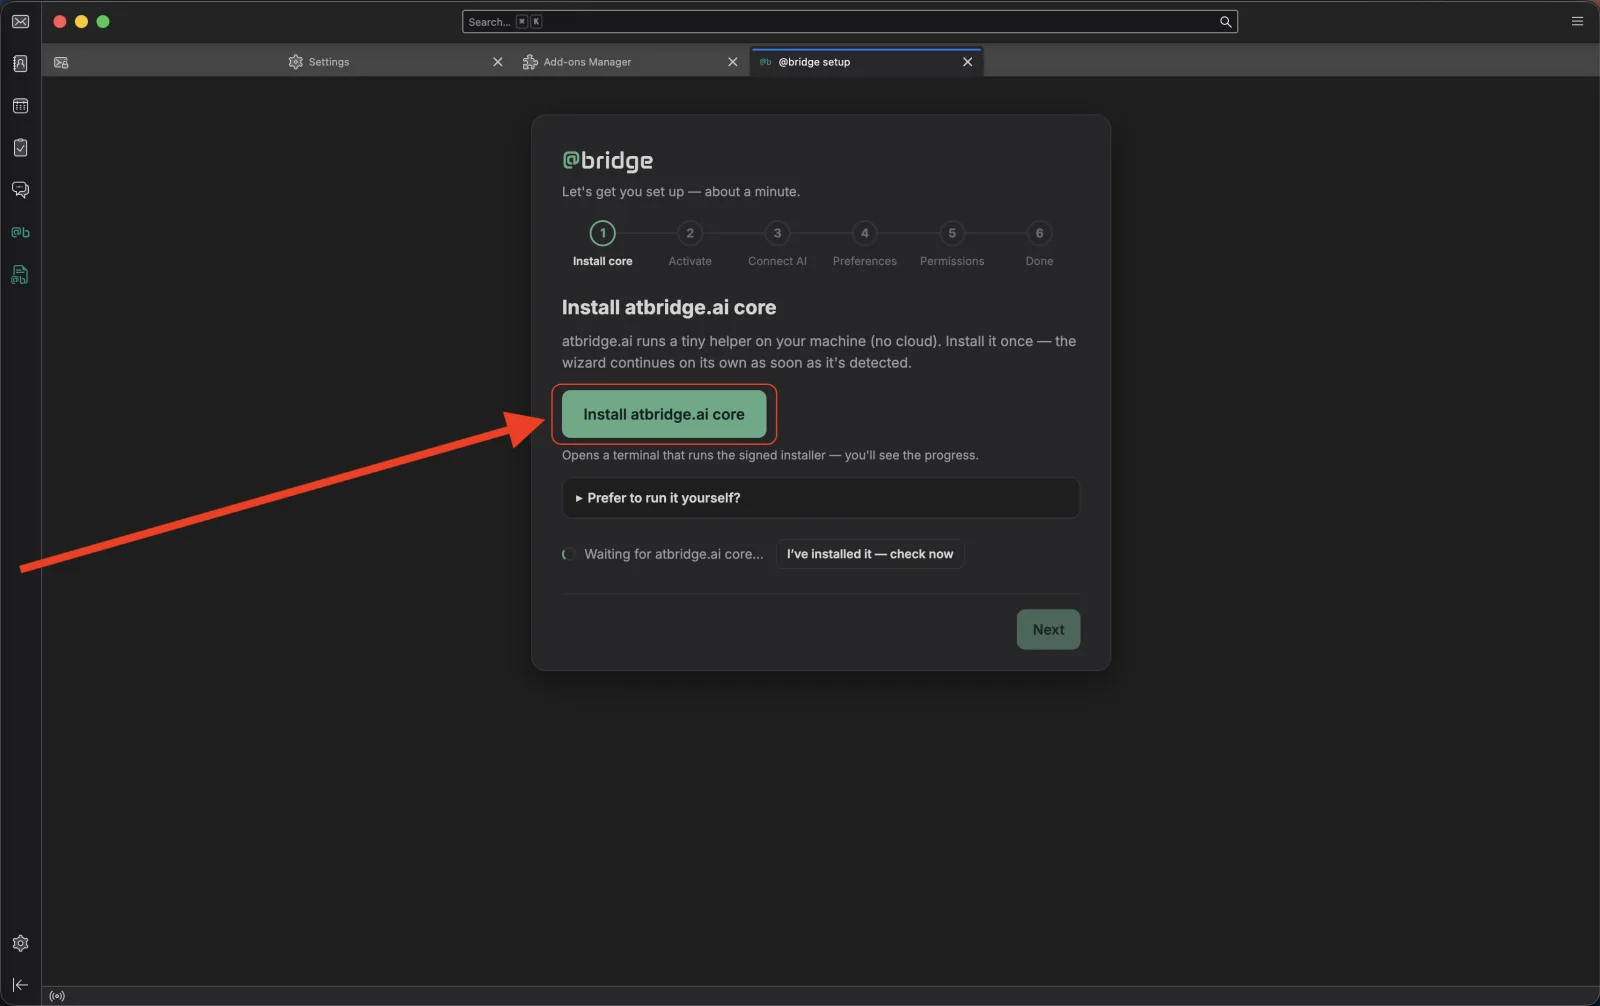
Step-by-step install guides are live — pick your OS and follow along:
Set up by hand — Linux, Snap or Flatpak, or if the wizard didn't finish
Install the core
Run one command. It downloads the atbridge core for your platform (a single small executable — no dependencies), registers it with your Thunderbird profile, and hands the add-on to Thunderbird — nothing else is touched.
$ curl -fsSL https://atbridge.ai/install.sh | sh$ curl -fsSL https://atbridge.ai/install.sh | shPS> irm https://atbridge.ai/install.ps1 | iexRun in PowerShell. No admin rights needed — everything installs per-user.
Verify it worked: atbridge --version should print a version number.
Connect & activate
Back in your terminal (PowerShell on Windows), connect the core to Thunderbird:
$ atbridge bridge installThen activate your plan — auto-detect walks your Thunderbird accounts and picks the right one:
$ atbridge license activateBought Personal or Pro? Give your Thunderbird account email at the prompt. Just trying it out? Press Enter to start the 14-day free trial.
Using Snap or Flatpak Thunderbird?
The confined app connects over the local bridge instead — run this in place of bridge install:
$ atbridge bridge service install && atbridge bridge service startAuto-detect can't read your accounts under confinement, so activate with your license key — find it in your account:
$ atbridge license activate --email you@example.com --key <your-key>Verify
$ atbridge license status --prettyYou want to see your plan, status ok, and Local storage enabled ✓. If that last row says DISABLED, in Thunderbird open Account Settings → Synchronization & Storage, tick "Keep messages for this account on this computer", then click Download Now.